
Return to the main repairs page.
Guiseppe Vinaccia 1898 - Soundboard repairs
The following pictures were taken during repairs to a Mandolin made by Guiseppe Vinaccia in 1898.
Clicking on any picture will open a new window, containing a larger image:
The Vinaccia as its current owner received it - its problems aren't apparent in this picture, taken from the auction:

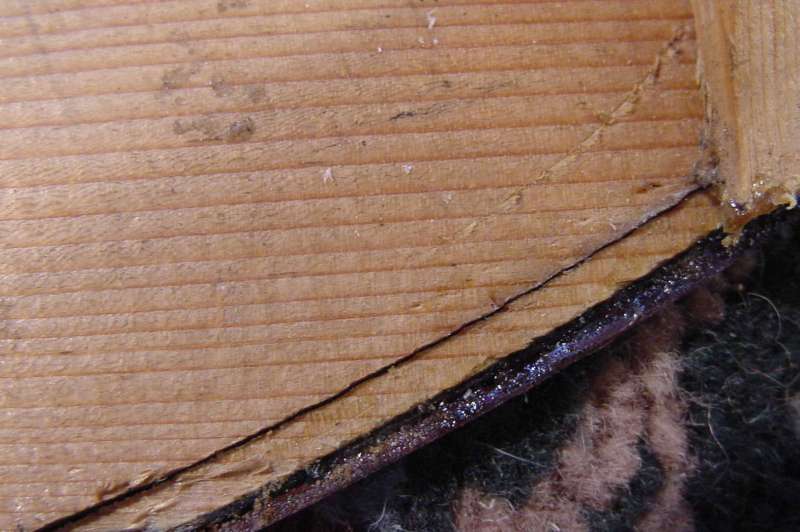
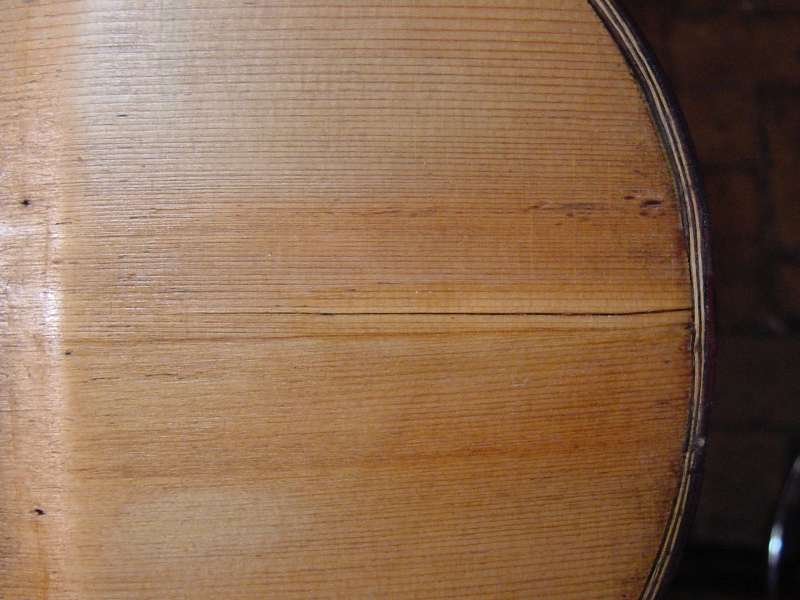
The channel into which the purfling around the edges of the instrument is inlaid had been cut too deep. As the soundboard had further dried and shrunk over the years it has cracked along the inside of the purfling channel. The following photographs show the crack running along the inside of the purfling channel:

This effectively meant that the majority of the soundboard was unsupported by the ribs, and would have caused the front to collapse soon under full tension.
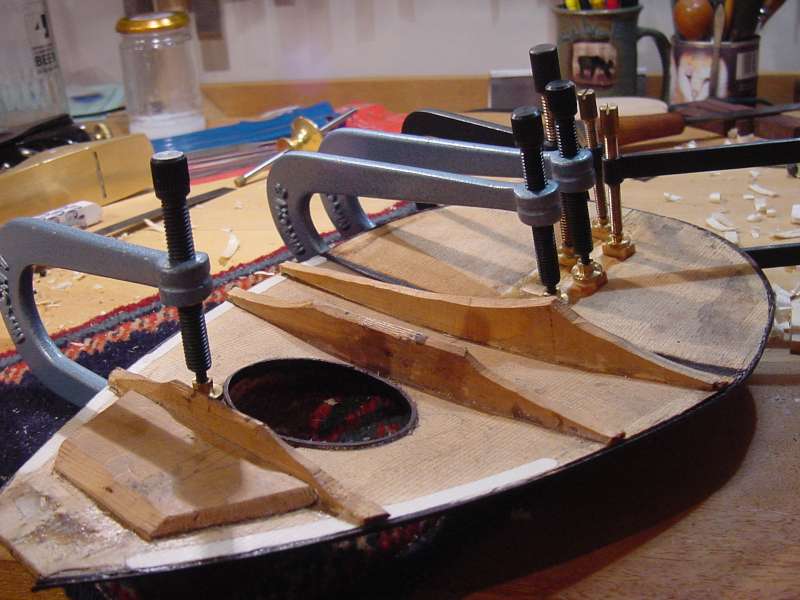
Because this cracking was occurring along the area where the soundboard and rib structure are glued together, it is impractical to cleat the crack with small spruce studs - as are normally used on cracks occurring elsewhere. An alternate method is used here, called underedging. The techniques used are very similar to those used when fitting a patch in the soundpost area of a Violin, though the form is different. The picture below shows one section of underedging which is in it's initial stage of rough fitting, while another beside it has been glued in place:
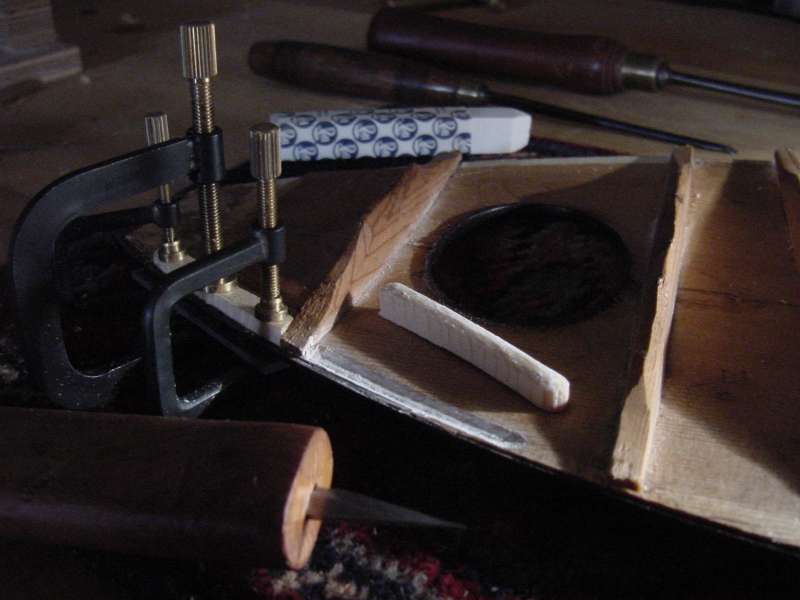
New spruce is fitted into the soundboard, along the length of the crack. In order for this repair to be strong enough to support the soundboard with the instrument under tension it is important that the new wood fits perfectly. In order to ensure that this is so, it is chalk fitted. The area that it is being fitted to is covered with a thin layer of soft chalk, and the new wood is pressed against it. The soft chalk sticks to highpoints on the new wood, which are then very carefully pared away with a razor sharp luthier's knife. This is repeated until the new wood is covered in chalk (and therefore fits perfectly), when it can then be glued into place. Once the glue has set the new wood is trimmed flush with the soundboard.
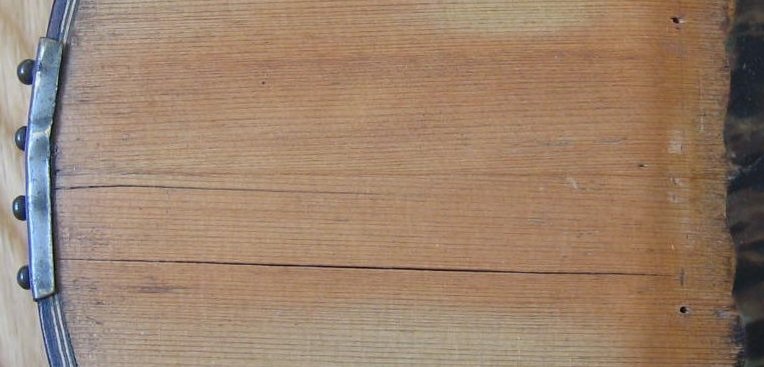
The next repairs necessary on this instrument were to two cracks in the lower bouts of the soundboard. One fairly long, running from the lower edge of the front to the bridge position, the other of slightly more moderate length.These can be seen here:
The next picture shows the major crack being clamped up, having first been cleaned.
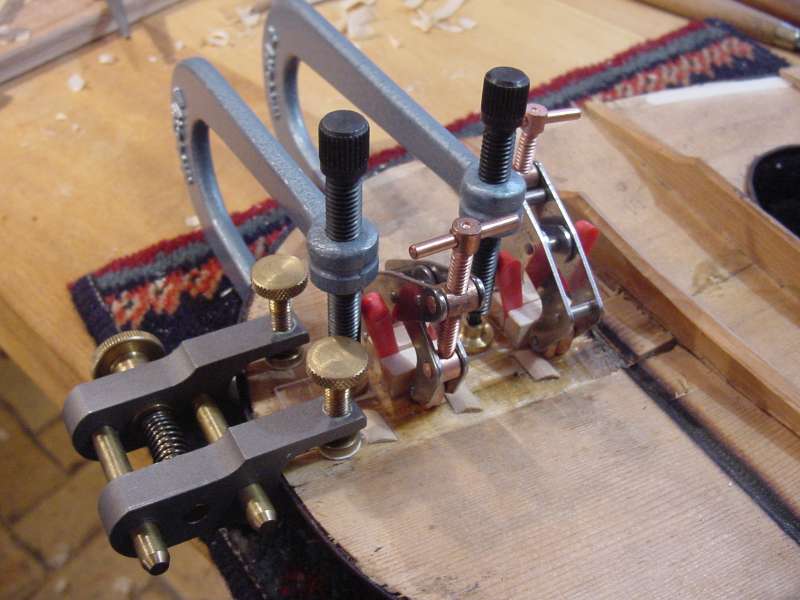
First of all small spruce temporary clamping blocks are fitted and glued to the inside of the soundboard, either side of the crack. Temporary studs have also been glued over the centre joint, to ensure that is not compromised during the course of the repair. The large grey clamp at the end of the plate is an end crack clamp, it is made of titanium for lightness. It has four screws that clamp to the soundboard on either side - both to fix it firmly to the plate, and to help level the crack. The large brass knob on its side pulls the two sides of the crack together. The chromed/coppered miniature parallel clamps are acting on the temporary blocks to pull the crack together. The red wedges are preventing the crack from twisting as it is clamped - ensuring that it comes together in parallel, these are very important to the success of this technique. The blue aluminium repair clamps are clamping over the crack, onto strips of clear perspex, ensuring that the crack is level. This repair technique was developed relatively recently, and is a big improvement over the old technique of using long stretcher clamps - though these can still prove useful at times, normally in conjunction with this technique.
As you can see from the following picture - the crack went together invisibly, the second crack is still open, but now cleaned:
Spruce cleats were fitted and glued over the repaired cracks:
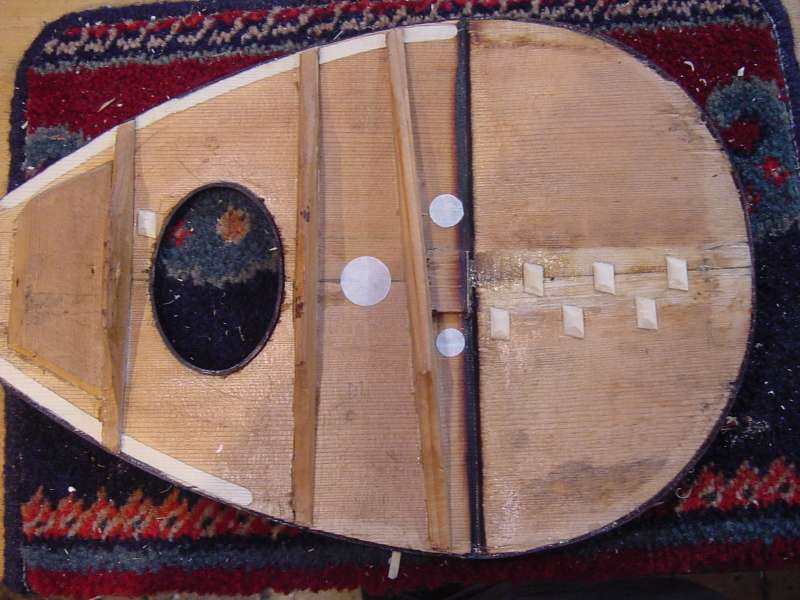
The following picture shows the inside of the soundboard with all the underedging fitted and trimmed up, and all the cracks glued and cleated. The small white discs are made of handmade Japanese Washi paper, I use these as a preventative measure where I can otherwise see some possibility of future problems. Handmade Washi paper contains long fibres, making it very strong, yet very light. The spruce cleats are made to be as small and light as possible while fulfilling their role in preventing the cracks from reopening, the Washi paper would be insufficient for use in these areas.
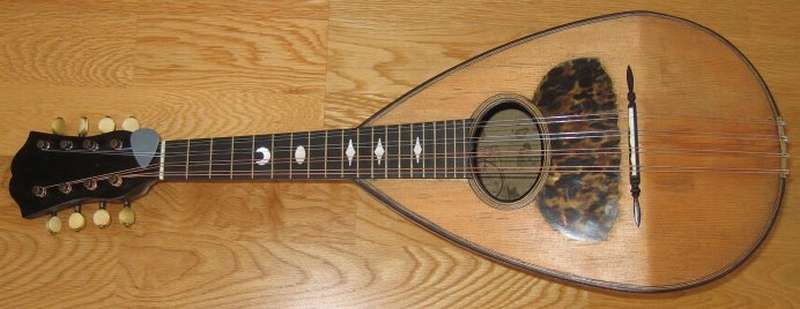
With these repairs completed, the soundboard was reinstated. The fingerboard that was on the instrument had been wildly inaccurate in it's fretting,
I therefore made a new one. After some discussion with the owner we decided that I should replicate the crescent/ellipse/elongated fluted diamond markers
that are found on the fingerboards of many Vinaccias.
I also repaired the original bridge, and made a new nut and a new compensated bridge saddle to complete the setup.
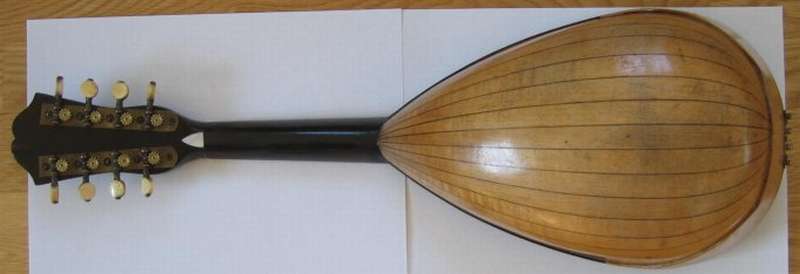
Below are pictures of the repaired instrument:

And the happy owner!

The final result of these repairs was discussed at The Mandolin Cafe.
I would like to thank Martin Jonas for the use of some of his photographs on this page.