Return to the main repairs page.
Repairs to a German cello made circa 1880
The following pictures were taken by Becky during repairs to a late nineteenth century German cello.
Clicking on any picture will open a new window, containing a larger image:
The cello was brought to me as the customer had noticed that several old cracks were open. Unfortunately the cello had previously been badly 'repaired' a long time ago with a lot of very bad techniques, and using white glue. This always makes a repair job much more tricky. In taking the front off, these problems became very apparent!
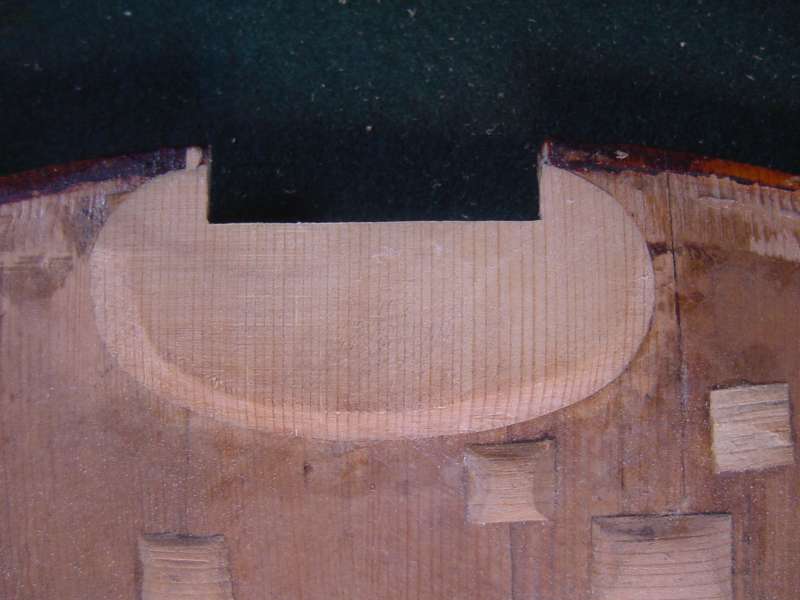
The previous person to remove the cello front had broken out large areas of the gluing platform on the cello front, especially in the block areas, and had simply filled them with polyfiller. I carved away the filler, and fitted spruce patches in these areas to restore the gluing surfaces. This is a photo of the top block area having been patched:
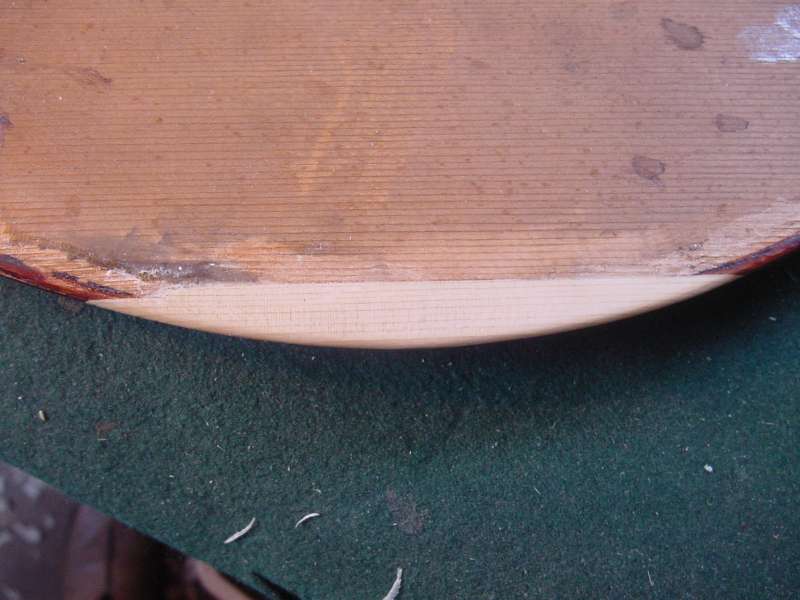
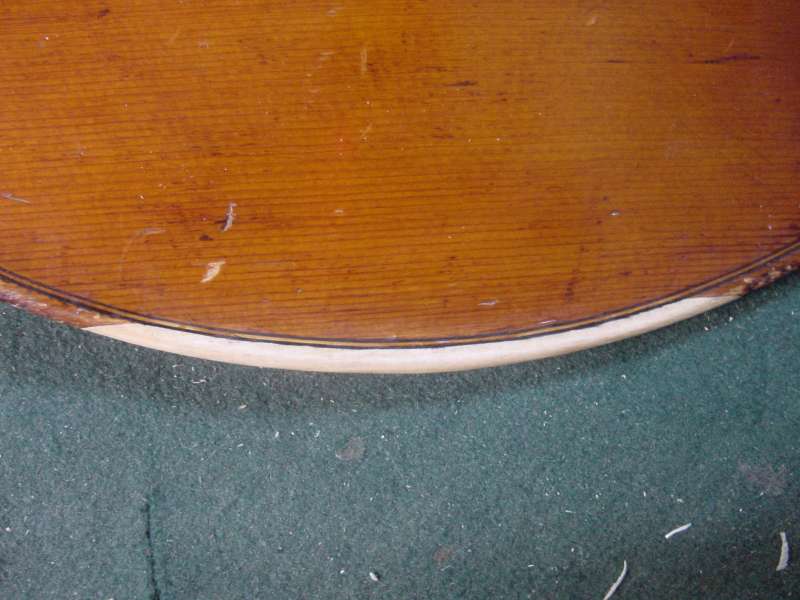
The underside of the upper bass corner had also been quite damaged in the past, with a substantial amount of wood being split away from the edge, and replaced with polyfiller. I used an 'under-edging' technique, but with the end of the spruce patch protuding from the inside of the corner where the edge had split right out.
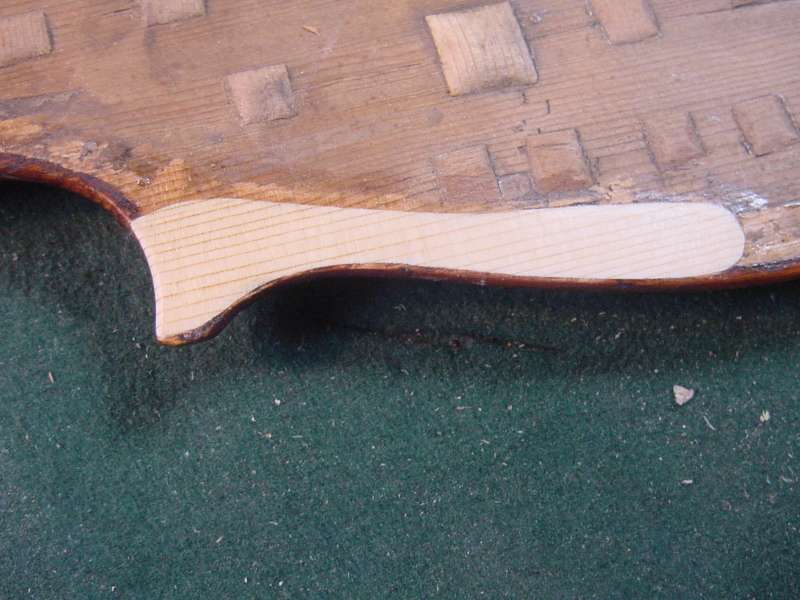
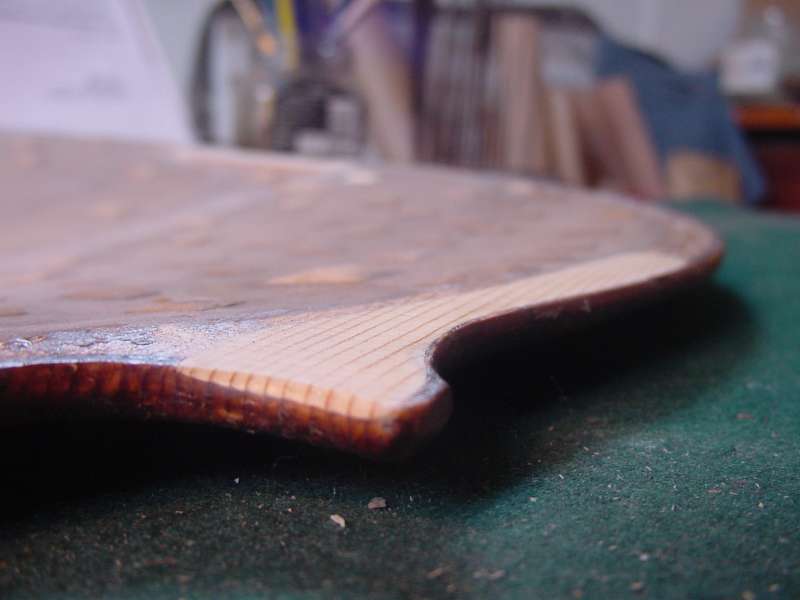
The lower treble edge had been badly damaged from the outside, but even more of the gluing platform had been split out from the inside. I fitted a new edge which joined up to the purfling on the outside, hiding the join, but which extended further in on the inside of the cello front to restore the gluing platform. This also made the new edge far stronger.
One of the big problems facing this cello was that someone had previously thinned down the front, especially in the area between the f-holes. In places, it was 3mm thick - this is what you would expect on a violin! As a result, the bridge pressure had caused the front to collapse in this area, as well as the cracking.
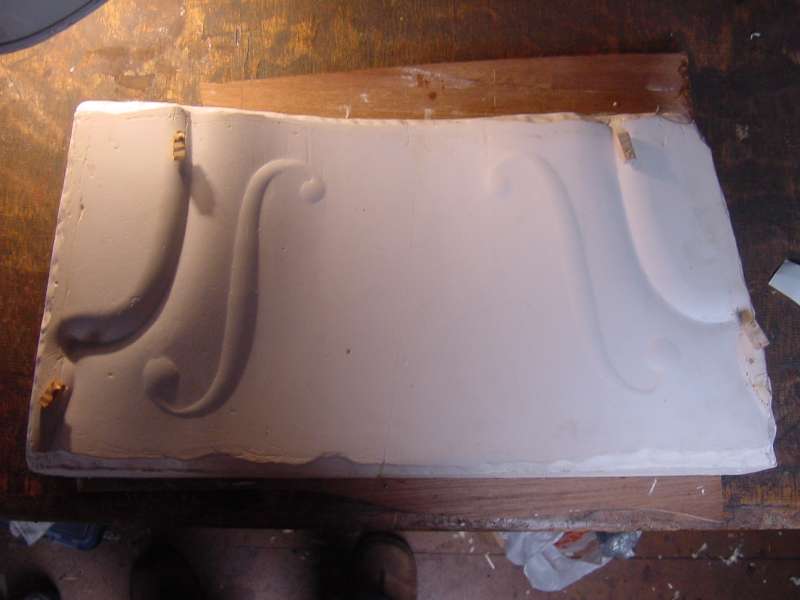
After cleaning and gluing the cracks in this area, I made a partial plaster cast of the front. I proceeded to scrape out the bumps in the cast in several stages - the negatives of the hollow collapsed areas on the cello front. This allowed me to 'press out' the arching back into it's original form.
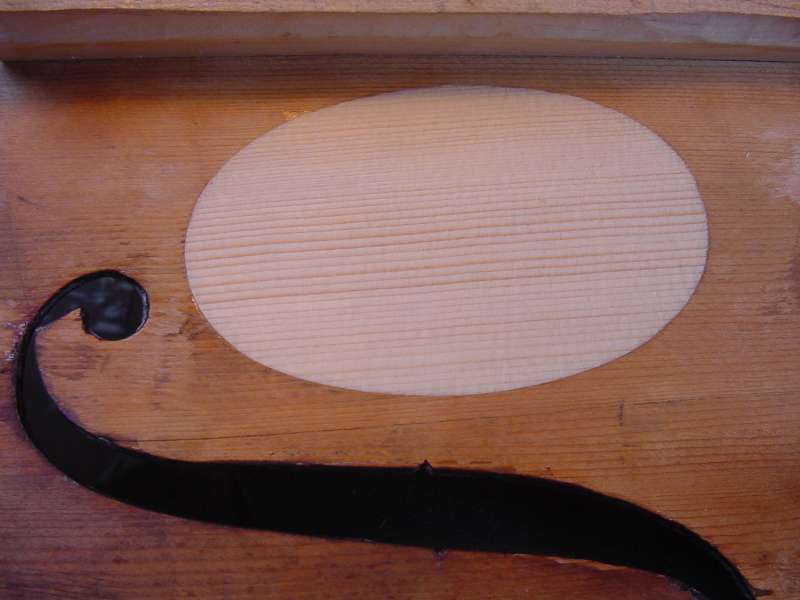
The cello front had sustained a 'soundpost crack'. Using the plaster cast as a cradle, I removed an egg-shaped section of wood from the cracked area and 'chalk fitted' a new piece of wood into it. 'Chalk fitting' is a frequently used technique in instrument restoration. It allows the repairer to perfectly fit the entire surface of a new piece of wood - even when it is a large and uneven surface to fit to, which can only be seen around the edges of the new peice. I slightly rotated the grain on the new piece of wood relative to the grain direction on the original wood to give the cracked area more strength. After gluing the patch, it is then carved back and smoothed flush with the surrounding wood.
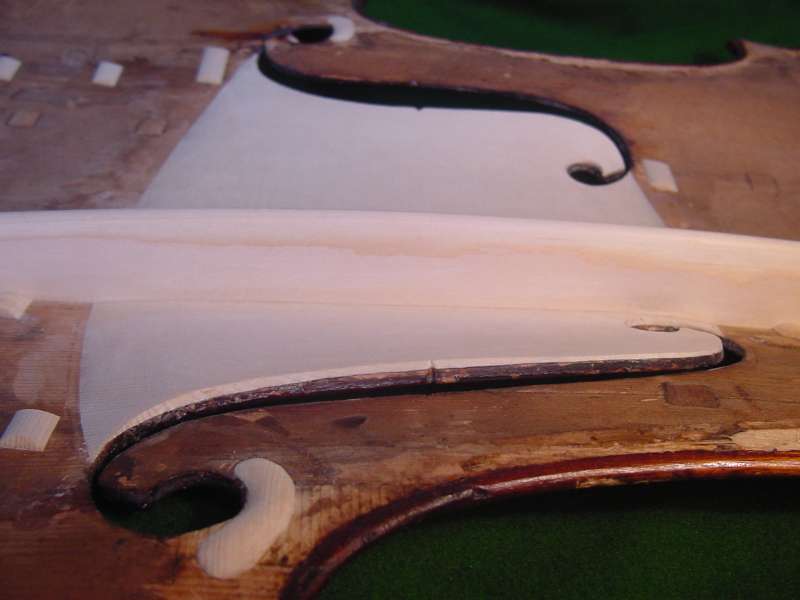
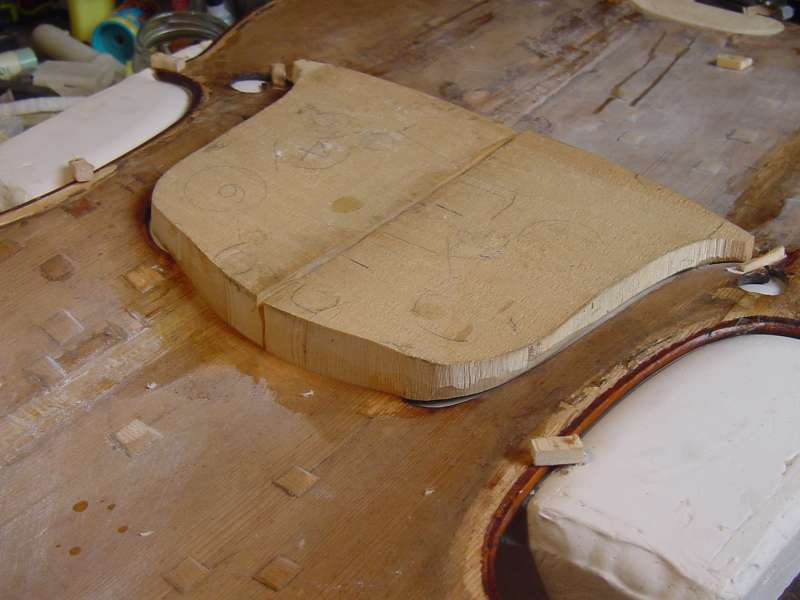
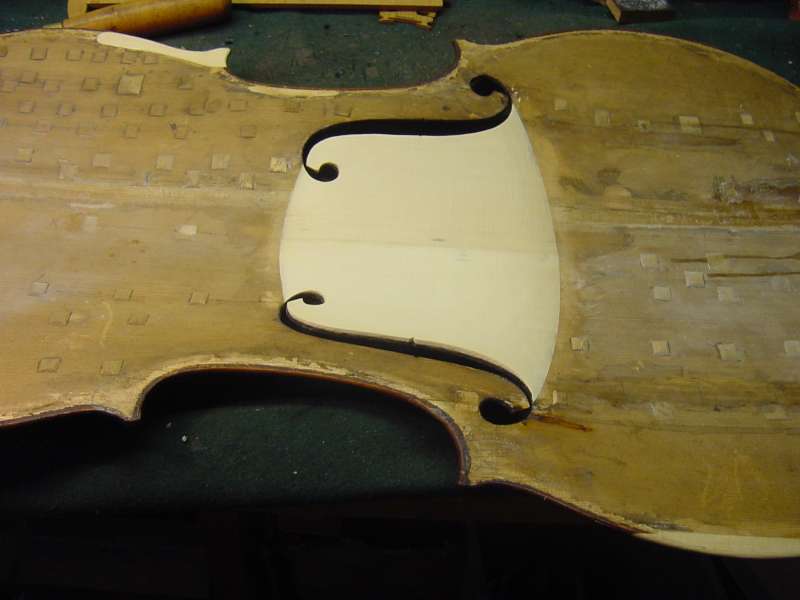
I then proceeded to fit a 'chest' or 'bell patch' to the cello front in two halves. This was to increase the thickness of the front in the thinned area which I had pressed out. This would make the area thick enough to be able to withstand the pressure from the bridge.
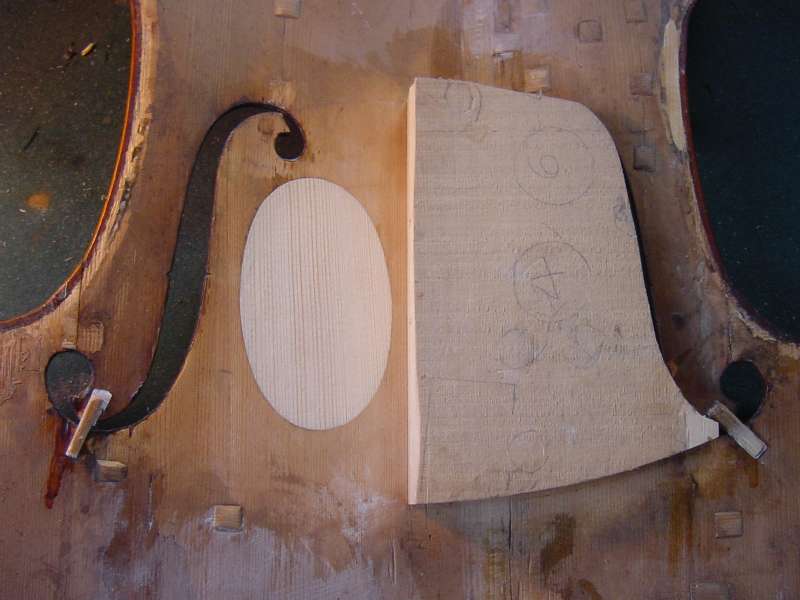
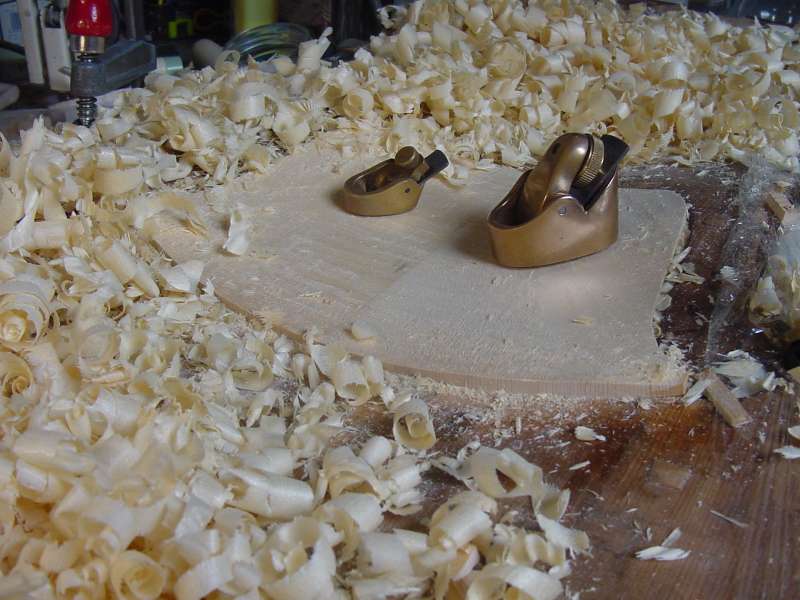
The patch was chalk fitted to the entire surface between the f-holes. It was glued in place with hide glue as a thick block of wood, and once dry, shaped back using gouges, thumbplanes and finaly scrapers.
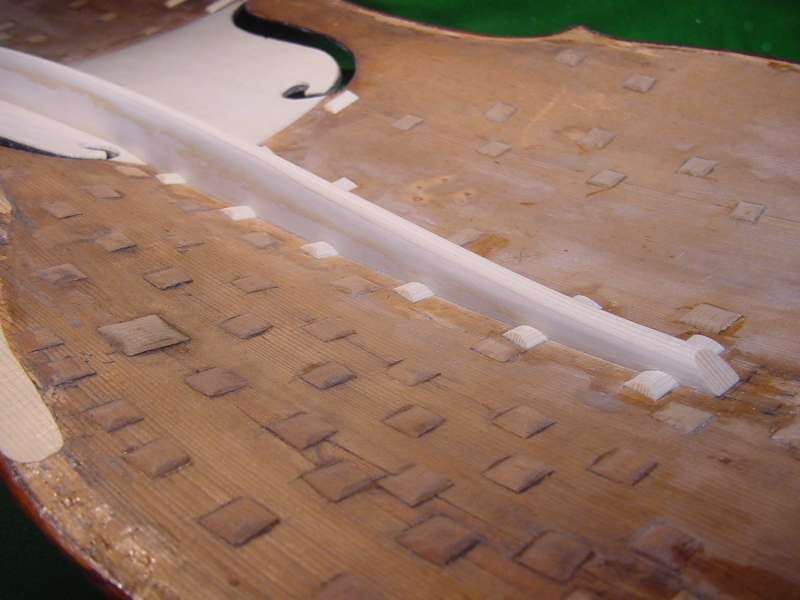
The bass bar, inside the front of the cello, had been an ill-fitting replacement one which had in turn lead to the distortion and cracking of the front. With all the cracks glued, and the arching pressed out, I proceeded to fit a new bass bar over both the chest patch and studs reinforcing the cracks.

The studs, like the front and bass bar, are made of spruce. They were chalk-fitted with their grain direction running at 90 degrees to that of the front, so as to hold the glued crack together. The studs were glued in position, and once dry were shaped. The bass bar was then fitted over them. When the bar fitted, it was glued into place, and finally once it was dry, was shaped.